EURO+DRIVE® FIAT 500 N/A
-First and foremost just a quick THANK YOU for purchasing our EURO+DRIVE® system. This install
procedure is fairly easy but if you do run into an difficulties please do not hesitate to contact us.
Tools Needed:
EURO+DRIVE® DEVICE
PC BASED COMPUTER (WINDOWS OS)
Time Needed:
20-50min (Dependant on Software Version)
Skill Level:
Level 1-5: Skill level .5 (Yes, POINT 5)
INSTALL PROCEDURE
PLEASE READ: HERE
!!!!!!!!PLEASE SEE FLASHING GUIDELINES LISTED AT THE BOTTOM OF PAGE!!!!!!!!
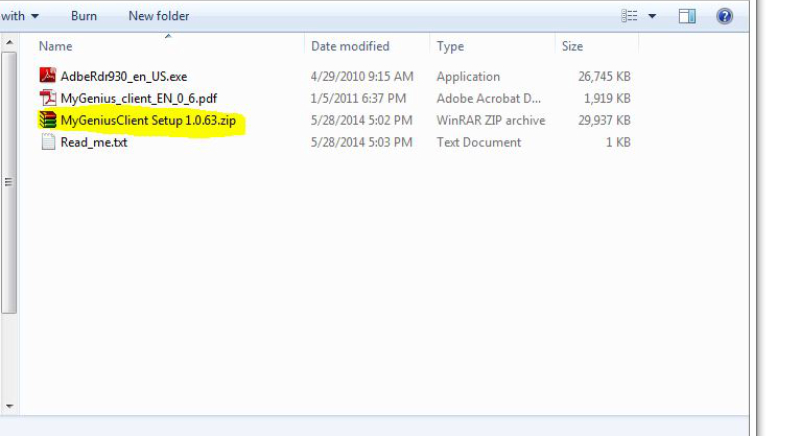
STEP 1 - Open the EURO+DRIVE® box and insert the USB card into your computer (Pic 1)
STEP 2 – INSTALL the My Genius Software, this installs all the necessary software and drivers (Pic 2)
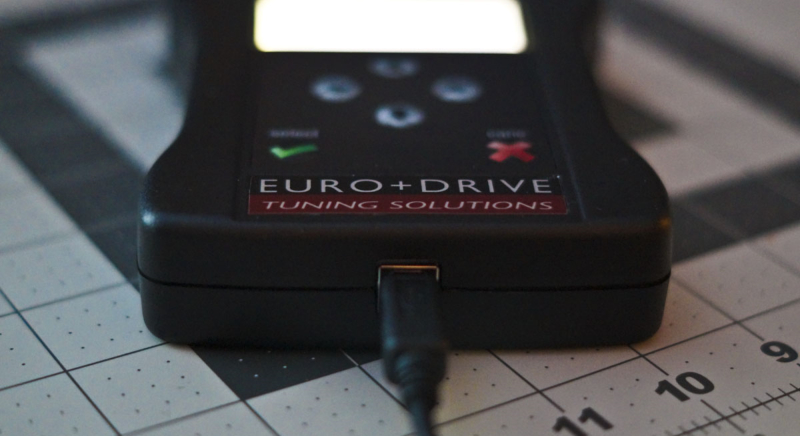
STEP 3 - Plug in your EURO+DRIVE® into the USB port on your computer (Pic 6)
STEP 4 - Click on the “MY GENIUS” shortcut on your desktop and click “UPDATE” (Pic 3)
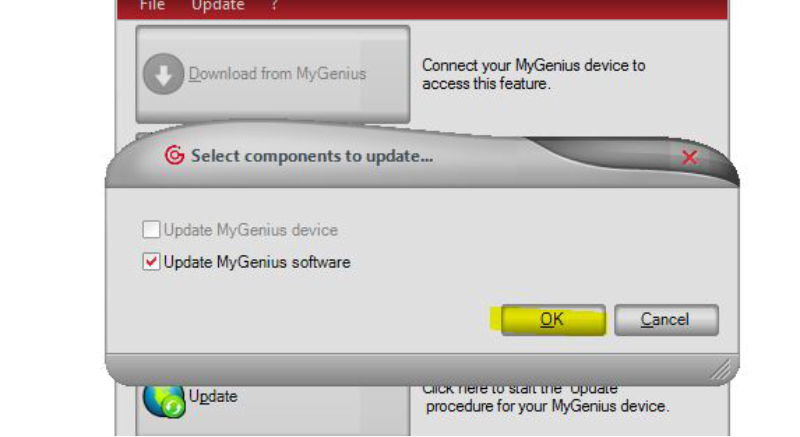
STEP 5 - UPDATE the “MY GENIUS” SOFTWARE and DEVICE (allow update to fail) (Pic 4)
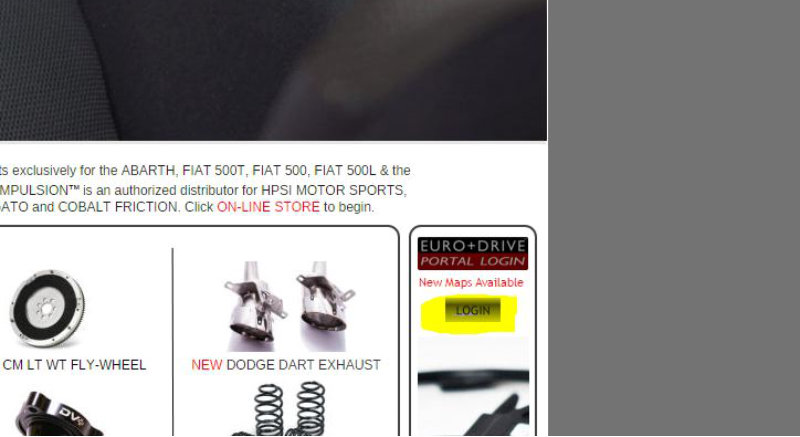
STEP 6 - Proceed to the EURO+DRIVE® PORTAL/CLOUD and Login, download your 1XXXXXXX. ABL file (Pic 5)
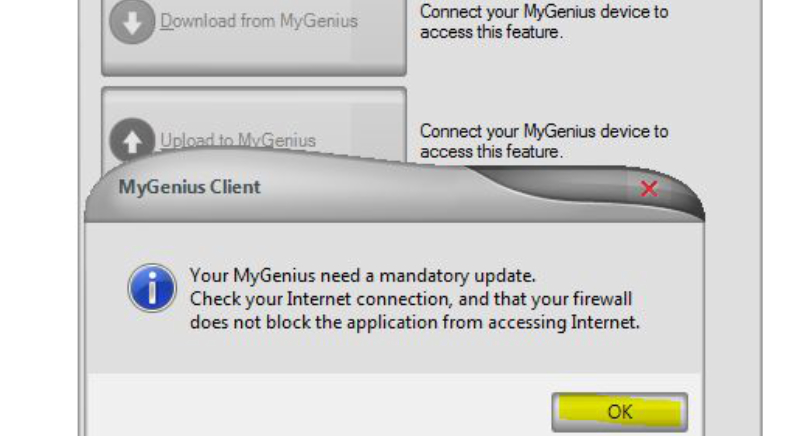
STEP 7 – You will receive two/three notifications just click OK for both, it is normal (Pic 7,8)
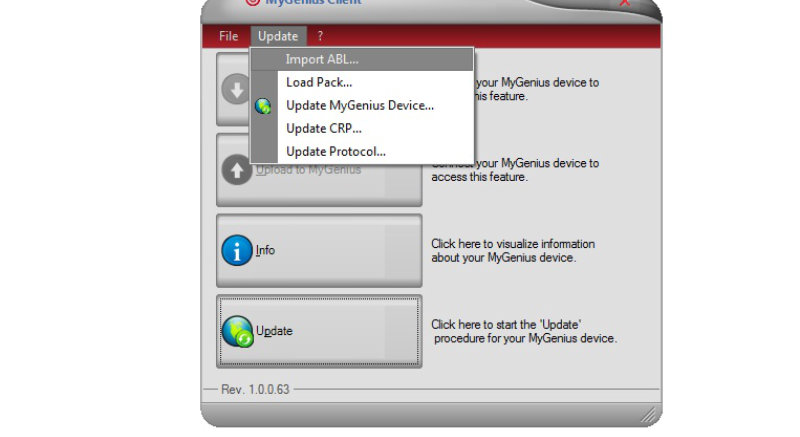
STEP 8 - Now Click on “UPDATE” and select “LOAD ABL” now locate the ABL file you downloaded earlier. (Pic 9)
STEP 9 – Follow the instructions and select the ABL file and allow the unit to register itself.
STEP 10 - Now click UPDATE the “MY GENIUS” software AND device (Pic 10)
STEP 11 – Allow the unit to update both the device and software. Once that is completed please proceed out to you car.
STEP 12 - Plug the EURO+DRIVE® into the OBD2 port with the included serial to OBD2 cable, place key in ignition.
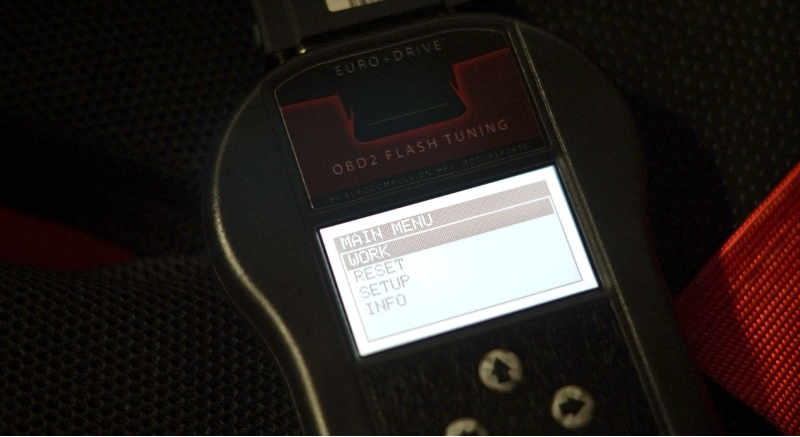
STEP 13 – Select “WORK” then “READ” it will ask you to confirm the ECU, everything is pre-selected just hit ok 3 times. (Pic 11)
***VERY IMPORTANT** (FIAT--->500 NEW 2007---->1.4L 8V 78kw/101hp IAW8GMF----> FLASH 0221---> CAN)****
***CHANGING YOUR PROTOCOL TO A DIFFERENT VEHICLE CAN LEAD TO A LOCKED ECU***
STEP 14 - Follow the dashboard on and off prompts and it will read and copy your stock file to the EURO+DRIVE™ device.
When flashing an AUTOMATIC vehicle when prompted for depress clutch pedal simply hit OK.
STEP 15 - One the file is stored on the E+D device please proceed back to your computer and plug the unit in via the USB
STEP 16 - Start the “My genius” Software and click “ DOWNLOAD FROM MYGENIUS”
STEP 17 - Copy the MYGfile.FPF file to your desktop
STEP 18 - Now log back in to your EURO+DRIVE® PORTAL/CLOUD and select upload file and upload the MYGfile.FPF
**** We will be AUTOMATICALLY notified that you have uploaded your stock file, please allow 1 business day for your file.
Other phase files will come automatically and you will be notified when updated files are available via email. ***
STEP 19 - Once you are notified there is a new file Proceed to your EURO+DRIVE™ Portal (Pic 5)
STEP 20 - Copy your new file to the desktop ( IE. xxxPHASE0.FPF)
STEP 21 - OPEN the “MY GENIUS” software and select “UPLOAD TO MY GENIUS” (Pic 12)
STEP 22 - Now UPLOAD your New file ( IE. xxxPHASE0.FPF)
STEP 23 - Go out to the Car plug in the EURO+DRIVE® via the OBD2 Port and place the key in ignition
STEP 24 - Select “WORK” Then select “WRITE” and follow the prompts (give it a second when turning on dash)
***After the flash has been completed you will receive an ERROR message, this is NORMAL and has to do with the
hill start and fuel cut-off etc being temporarily disabled during the flash, do not worries it is still active once you
start the car. (pic 13)***
***AUTOMATIC VEHICLES MAY ENCOUNTER A CEL U0100, this is normal and will clear on its own, its a generic
communication code associated with the lack of a clutch pedal***
Congratulations Your All Finished! Thank you for your purchase. If you have any comments or concerns
please do not hesitate to contact us.
INSTALL NOTES:
- Your ABL file is your licensing file, without this your EURO+DRIVE® is inoperative. Following and loading
your ABL file is imperative and only needs to be done once to register/activate the unit in our system.
- TIP OF THE DAY: before writing to the car drive the car around till it is warmed up, it will cut down the warm up period
significantly when flashing the car.
FLASHING GUIDELINES
1. Allow for AT LEAST 10 seconds between ignition on/off cycles.
Most of this is prompted and timed by the Euro+Drive unit anyway, but it's important to allow for at least 10 seconds between your key off and on cycles.
This gives the ECU time to recognize and resolve flash procedure DTCs, as well as sensor checks and system learning. Do not be hasty with this. If you
are you may get transmission learning codes as well as other codes. These can be cleared, but it's best to avoid them altogether.
2.Depress the clutch fully, and release when prompted.
It's important to carry out this action in a very deliberate and determined manner. Do not rush it, and make sure you have fully depressed it and
released it. Also, remember step 1. Even if you have carried this out in less than 10 seconds, you still need to wait before cycling the key off and
hitting the prompts.
3. Try not to use AUX devices, radio, AC, or other functions from within the car while doing this procedure.
This can possibly disrupt voltage readings emulated from the unit to the ECU, causing codes or interruptions, etc.
4. Start warm up phase
This phase is critical. This allows the ECU to monitor misfiring, throttle calibration, and sensor readiness. At this point, once the engine is
started there should be no remaining DTCs or illuminated dash lights other than the usual.
5. Once the coolant temp indicator on the dash reaches 3 bars high, sharply depress the throttle pedal until a point of over 6000 RPM is reached.
Please make sure you are in neutral and the handbrake is up ;)
6. Allow the car to return to idle for the remainder of the warm up period.
Like stated before, this period is very important. Failure to complete it properly can result in post flash misfire, transmission, and throttle codes.
It was stated that often a few customers with stock engines receive the P1302, P0106, P2173, and P1D7F because of the effects of the post flash
procedure. They usually clear DTCs, do a key cycle, and back to normal. I've not seen this with my own test vehicle, but I'm sure there are some
techs that can possibly shed light on this procedure. I'm not positive it will solve all throttle issues either, but it is worth sharing in case troubleshooting
using this is effective. Obviously, our units proceed a bit differently than the tools the dealer will use, but it was interesting to learn that there are
common flash bugs and system checks present in the ECU that Fiat has methodically put in place for the MM unit to keep track of itself and the
peripheral engine components.


1.
2.
3.
4.

5.
6.
7.
8.


9.
10.
11.
12.

13.


EUROCOMPULSION® LLC/EURO+DRIVE® 2015. All Rights Reserved. Not affiliated with FIAT/DODGE. All Products Are RACE/OFF-ROAD Use ONLY. JOLLY CLUB LOGO used with permission.


Alfa romeo 4c
ROADRACE MOTORSPORTS
modern performance
abarthonly.com abarthonly abarthonly
500madness.com
alfa 4c tuning
alfa 4c intake
modern performance
https://www.ngencustomsandperformance.com/
ROADRACE MOTORSPORTS

alfa 4c forum